Vermicomposting, or worm composting, is an efficient method to recycle kitchen scraps and other organic waste into nutrient-rich compost using earthworms. It’s an ideal solution for those wanting to reduce waste and enrich the soil in their gardens. Here’s a detailed guide on how to start vermicomposting:
What You Need:
1. Worm Bin: You can buy a pre-made worm bin or make your own from plastic bins, wooden crates, or even old bathtubs. The bin should be shallow rather than deep, as worms prefer to feed near the surface.
2. Bedding Material: Common bedding materials include shredded newspaper, cardboard, peat moss, or coconut coir. Avoid glossy paper or heavily inked materials.
3. Worms: Red wigglers (Eisenia fetida) are the most commonly used worms in vermicomposting as they thrive in composting bins. You will need about 1,000 worms (roughly 1 pound) for a standard-sized bin.
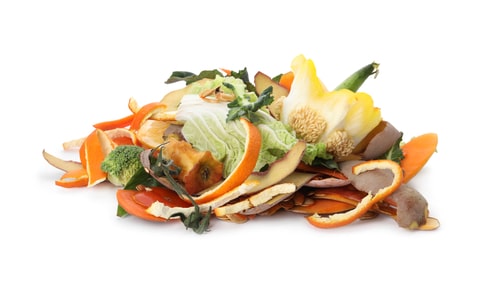
4. Kitchen Scraps: Fruit and vegetable peels, coffee grounds, tea bags, and crushed eggshells make excellent food for your worms. Avoid meats, dairy products, oily foods, and spicy scraps, as they can attract pests and cause odors.
Setting Up Your Bin:
1. Prepare the Bedding: Moisten your bedding materials so they are damp but not dripping, and fill the bin about three-quarters full. Fluff the bedding to prevent compaction, which can reduce aeration.
2. Add the Worms: Spread the worms over the top of the bedding. They will burrow into the bedding in search of food.
3. Feed Your Worms: Start by adding small amounts of kitchen scraps under the bedding to avoid overfeeding, which can lead to odor problems and attract pests. Over time, you can increase the amount of food as the worms multiply and can consume more.
Maintenance:
1. Maintain Moisture and Aeration: The bedding should remain as moist as a wrung-out sponge. If it dries out, mist it lightly with water. Also, fluff the bedding periodically to ensure it doesn’t compact, allowing air to circulate.
2. Harvesting the Compost: After 3-6 months, the bedding and food scraps will be transformed into dark, crumbly compost. To harvest, move all the compost to one side of the bin, and place fresh bedding and food on the other side. Over a few weeks, the worms will move to the fresh side, allowing you to remove the compost.
3. Using Your Compost: Vermicompost is a potent organic fertilizer and soil conditioner. You can use it directly in your garden or mix it into potting soils.
Troubleshooting:
Odors: If your bin starts to smell, it could be due to overfeeding, not enough aeration, or a lack of balance in the types of food provided. Adjust as necessary.
Pests: Fruit flies can be a problem if too much food is exposed. Bury food scraps well and consider placing a layer of moist newspaper over the top of the bedding.
Benefits of Vermicomposting:
Waste Reduction: Reduces the volume of waste sent to landfills.
Soil Health: Enhances soil structure, moisture retention, and nutrient availability.
Plant Growth: Helps in the growth of healthier plants by providing them with rich organic matter.
Vermicomposting is a rewarding activity that contributes significantly to sustainable living. By following these steps, you can set up a successful vermicomposting system and enjoy the benefits of this fantastic natural recycling process.


